Retro Mini TV Game Console with Wireless Controller
Retro Mini TV Game Console with Wireless Controller
BUNDLE & SAVE
Couldn't load pickup availability

1000X Handheld Digital Microscope

Mini Bluetooth Karaoke Speaker with Wireless Microphones

Next-Generation 6-in-1 Smartwatch Kit

Retro Mini TV Game Console with Wireless Controller
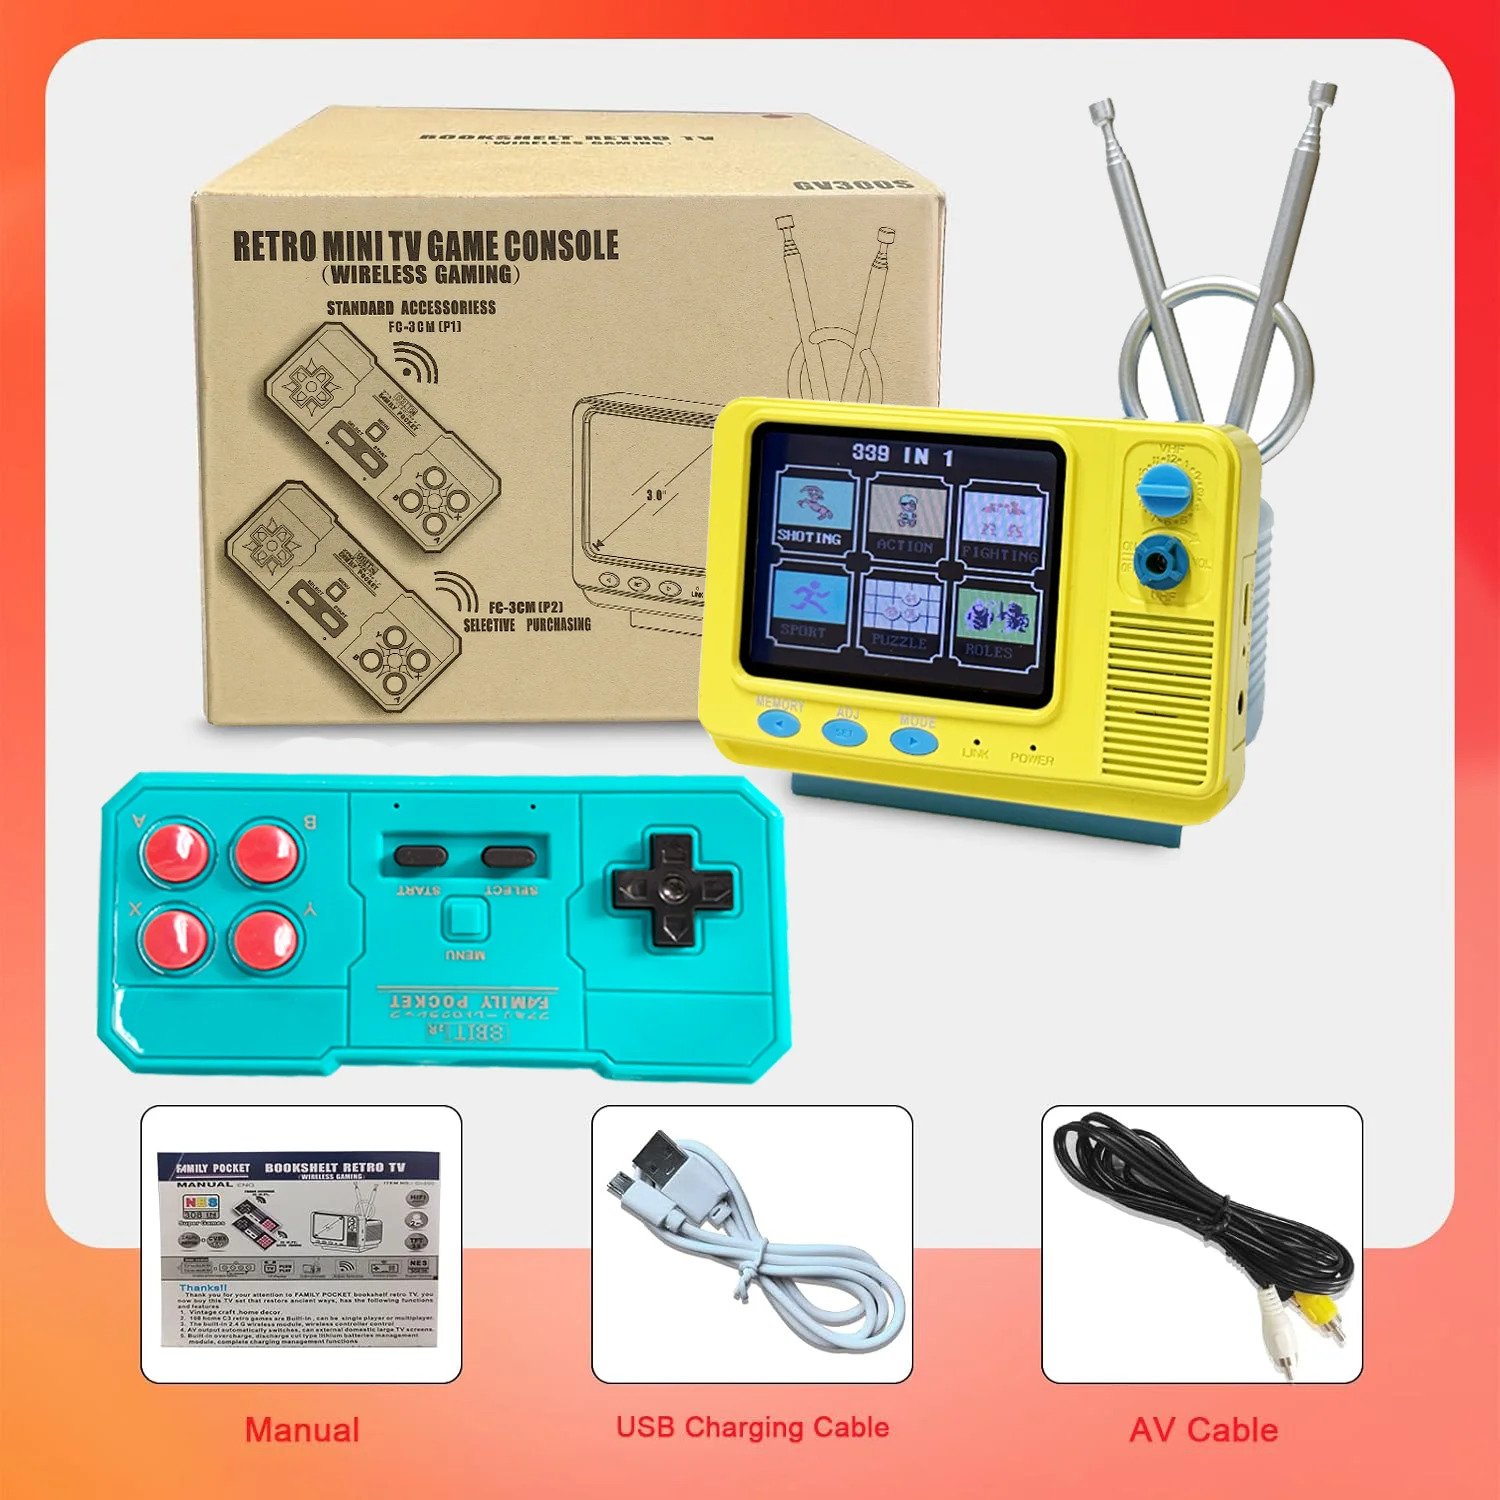
Retro Mini TV Game Console with Wireless Controller Built-in 168 Classic Games Handheld Game Player Support AV Output for Kids

📋 Product Specifications & Details
General / Basic Info
Model: GV300S
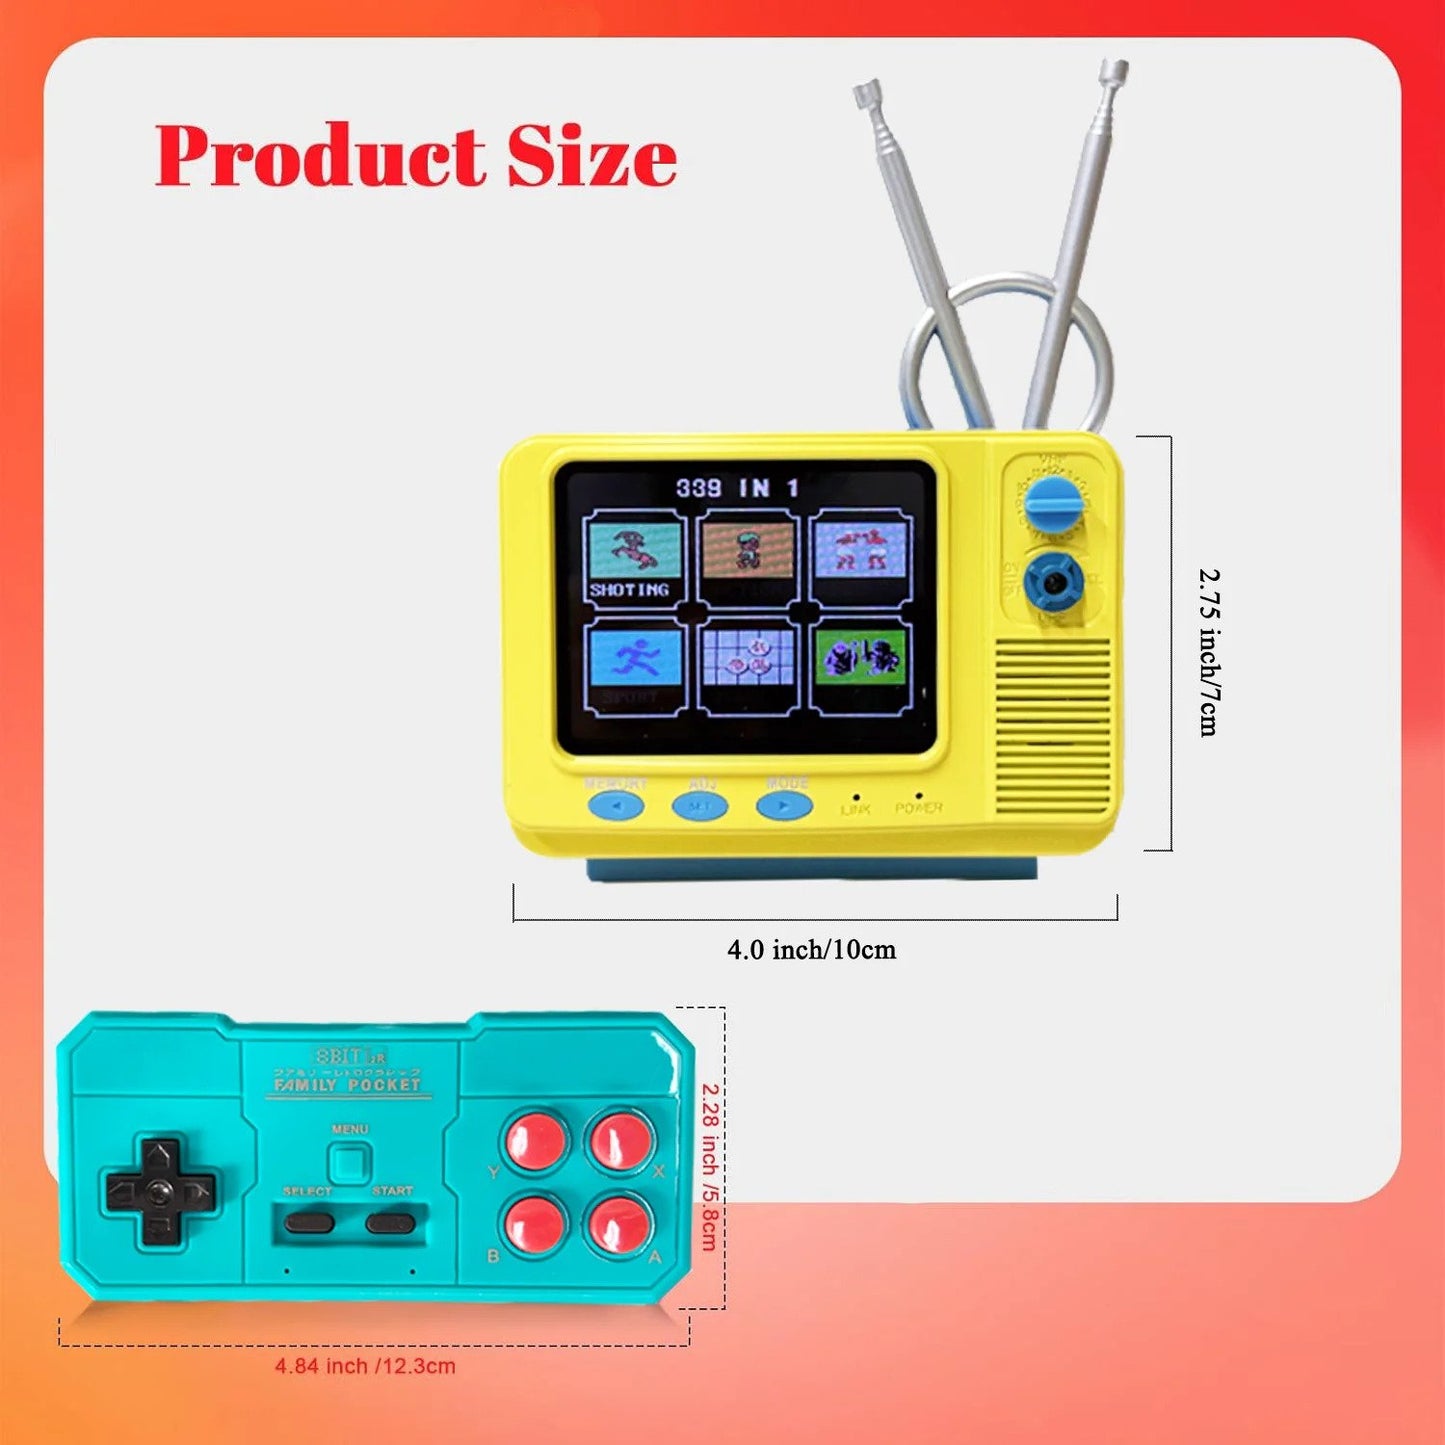
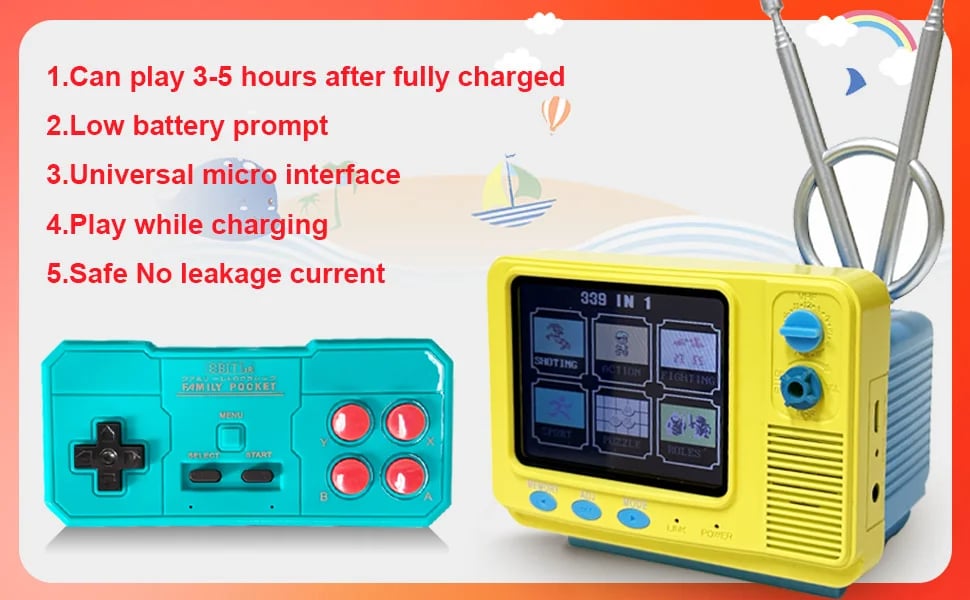
Display: 3.0-inch screen (built-in)
Memory: 128 MB (internal)
Wireless Controller Frequency: 2.4 GHz wireless gamepad included
Audio Output: Hi-Fi audio output
Power Supply / Battery Options: Supports dual battery power supply (two battery power modes)
Battery (Internal): Rechargeable lithium battery, high capacity (800 mAh) — slow/fast charging supported
External Power / Output Option: TV output supported (720P TV output)
Features & Functions
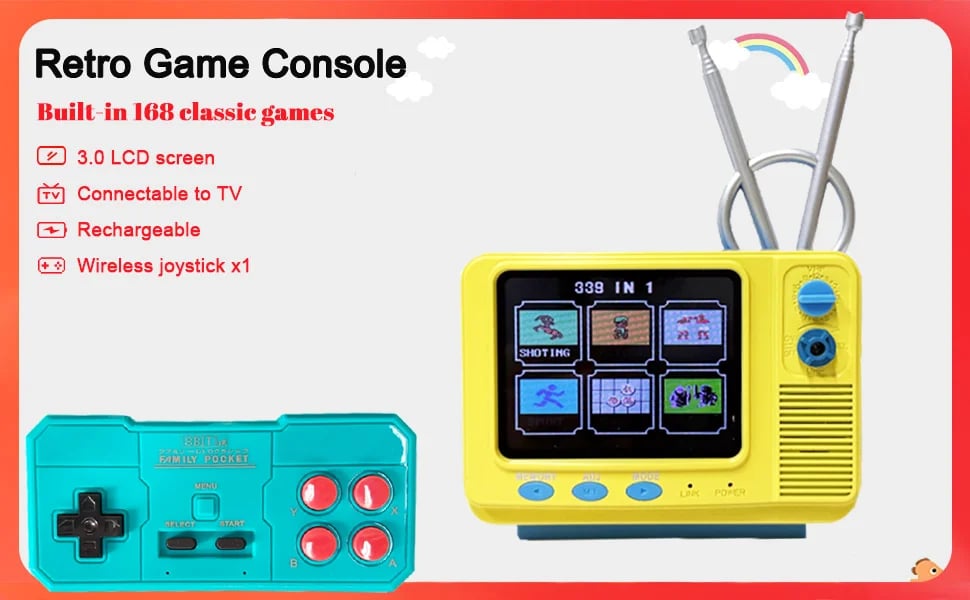
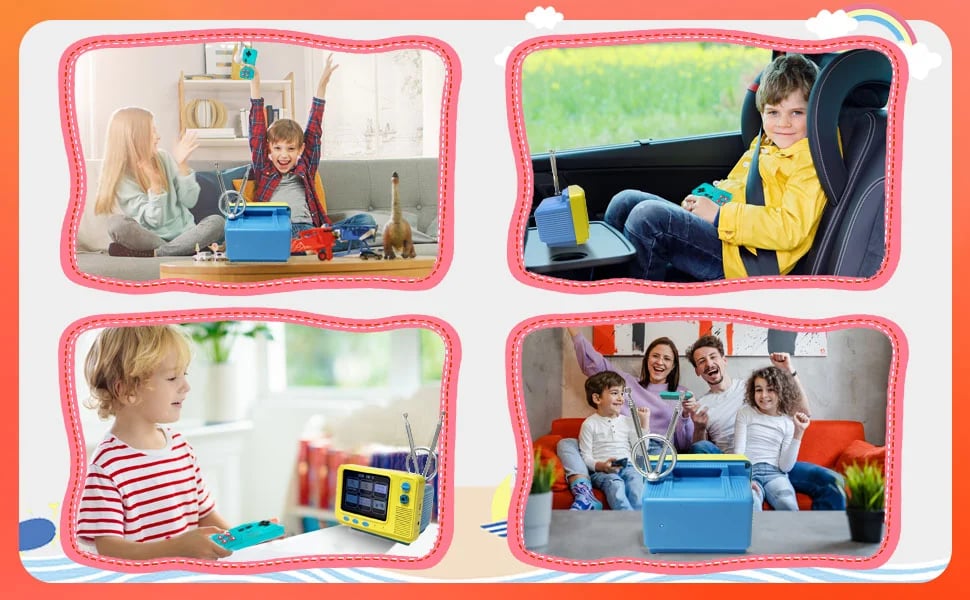
Classic retro / vintage handheld game console style — nostalgic look and craftsmanship-inspired exterior.
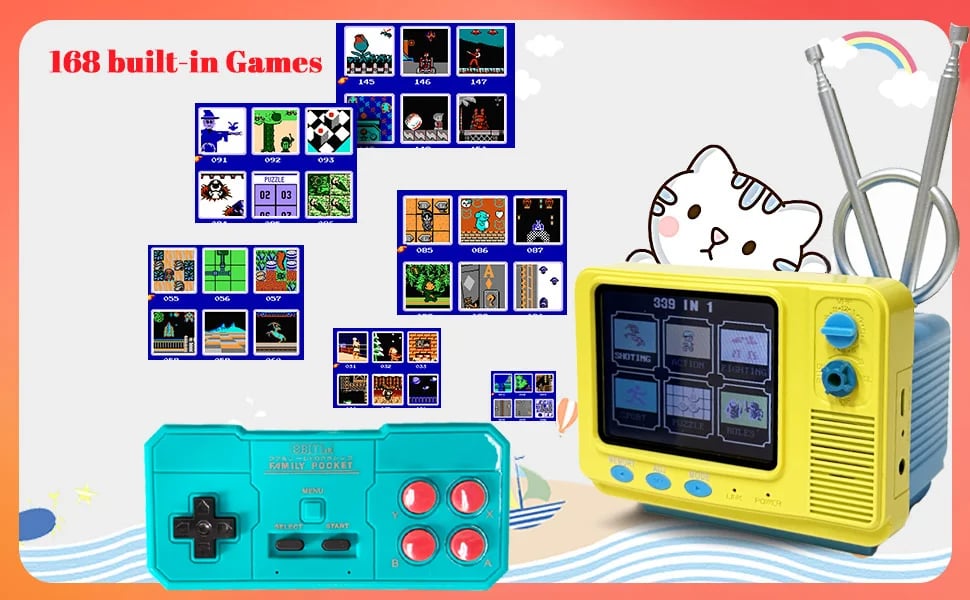
Built-in 339 classic retro/home video games (single-player only).
Wireless 2.4 GHz module + wireless controller for convenient, cable-free gameplay.
AV output auto-switch — can connect to home large-screen TV to play games on a big screen.
Built-in charging management module — protects against over-charge and over-discharge; ensures battery safety and longevity.
Dual battery operation supported: internal rechargeable battery OR external battery power mode (user-replaceable).
⚙️ Operations / Usage Instructions & Notes
Power / Battery / Controller Setup
- For the wireless controller (P1), use standard AAA batteries (user supplied). Insert according to polarity marked on the battery door. The console itself uses a 3.8V lithium battery — only use the factory-provided battery; using wrong batteries may damage the unit or prevent operation.
- On first use — charge the console for 4–6 hours. After charging, press the system reset button 1–3 times to initialize settings for optimal performance.
- After full charge, rotate the ON/OFF power switch to “ON” — the power indicator will light up. Insert batteries into P1 controller — it will auto-pair; controller LED stays steady when paired correctly. Then you can start playing solo.
TV Output / External Display
The device supports both its built-in TFT screen and external TV output. To connect to a TV: use the included standard AV cable — insert the 2.5 mm plug into the console, and plug the red and yellow RCA ends into the TV’s AV input ports.
On the TV, set input to the corresponding AV channel.
Red plug → audio signal; Yellow plug → video signal.
Basic Gameplay Operation
- Switch the console to the “ON” game mode — after 1–2 seconds, the game menu appears. Use the panel arrows / controls to navigate. Increase volume by rotating the volume knob.
- Use the designated standard game controller (FC-1F). Insert AAA batteries in the controller battery compartment. After inserting, the console and controller auto-pair — P1 becomes the main controller.
- Use the controller’s directional keys to choose a game, then press START or A to begin a game.
Troubleshooting / Re-initialization
If the controller’s LED flashes, pairing failed — restart the console, remove and re-insert batteries in the controller, then re-pair.
If screen glitches, white/blank screen, audio distortion or noise occurs — plug in USB cable and connect to a standard USB power source to charge, or press the “SET” key (system reset) to restore factory settings.